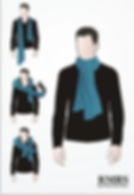
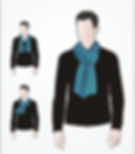
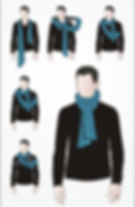
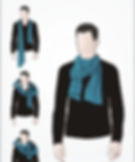
10 FORMAS DE PONERSE UNA BUFANDA CON UN POCO DE ESTILO
- The Trendy Man
- 10 nov 2023
- 9 Min. de lectura
Actualizado: 22 ene

Parecía increíble pero sí, por fin las temperaturas han empezado a bajar y lo están haciendo de tal forma que ya hemos empezado a sacar las bufandas del armario para no pillarnos un resfriado de aupa.
Y es que, junto con los abrigos y los jerséis gruesos, las bufandas son imprescindibles en cualquier armario de invierno. Además de abrigar, este accesorio suele ser la pieza que le falta a nuestro atuendo de invierno, ya que añade interés, color o incluso un estampado divertido. Sin embargo, existen numerosas soluciones para anudar una bufanda, y cada giro o nudo tiene la capacidad de realzar instantáneamente cualquier look.
En total, te vamos a desvelar 10 formas de ponerse una bufanda con un poco de estilo que, lo sé, parecen muchas para un trozo de tela tan pequeño pero no lo es.
Así que, si quieres ir más allá de ese simple recogido, sigue leyendo para conocer algunas formas divertidas de anudar una bufanda, que te ayudarán a sacar el máximo partido a este pequeño extra durante toda la temporada.
Along with puffer coats and chunky knit sweaters, scarves are an essential part of any winter wardrobe. Aside from providing warmth, this accessory is often our outfit's missing piece, adding interest, color, or even a fun print. However, there are numerous solutions for how to tie a scarf, and each twist or knot has the ability to instantly boost any look.
All in all, we've discovered 10 ways to tie a scarf — which sure feels like a lot for such a tiny piece of material. With a helpful step-by-step video, as well as a few GIFs breaking down the process, you'll see exactly how to play around with your average 30'' x 80'' design.
So, if you're hoping to go beyond that simple drape, read on for a few fun ways to tie a scarf, helping you make the most out of this little extra all season long.

1. Nudo drapeado
El drapeado es más elegante que funcional. No hay que anudar la bufanda, pero es una forma estupenda de dar un toque de color a un abrigo monótono y llamar la atención sobre el rostro.
La bufanda drapeada es ideal para cuando hace fresco, pero no frío. Como su nombre indica, sólo tienes que colocar la bufanda sobre el cuello, a la misma longitud a cada lado, y no anudarla.
La bufanda drapeada funciona mejor con una bufanda de longitud corta a regular.
The Drape scarf knot leans more towards style rather than function. You don't tie the scarf at all – but it’s a great way to add a dash of color to your drab overcoat and draw attention to your face.
A scarf drape is best for when the weather is cool, but not cold. As the name implies, just drape the scarf over your neck, equal lengths on each side, and don't tie it – you’re good to go.
The scarf drape works best with a short to regular length scarf.


2. Nudo de una vuelta
Este tipo de atado no es realmente un nudo, pero proporciona más calor alrededor del cuello que la bufanda drapeada, por lo que se puede llevar en climas más fríos. Empieza enrollando la bufanda alrededor del cuello, haciendo un extremo más largo que el otro.
Coge el extremo largo de la bufanda, pásalo alrededor del cuello y ya está; no hace falta hacer ningún nudo. Los extremos de la bufanda pueden tener la misma longitud o ser desiguales, a gusto del usuario.
With the Once Around scarf knot, you still don't really tie the scarf, but it provides more warmth around the neck than the scarf drape, and so can be worn in colder weather. Start by draping the scarf around your neck, making one end longer than the other.
Take the long end of the scarf and bring it around your neck and you’re done – no need to tie a knot. The ends of the scarf can either be equal length or uneven – it's really up to the wearer’s preference.


3. Nudo sobre mano
Este nudo es muy sencillo de hacer, tiene un aspecto limpio y funcional, y protege bien el cuello cuando hace frío.
Colócate la bufanda alrededor del cuello, con un extremo más largo que el otro. Cruza el extremo largo de la bufanda por encima del corto y, a continuación, pásalo por debajo y a través de la abertura cercana al cuello para hacer el nudo.
Después de hacer el nudo, tira de ambos extremos del pañuelo para apretarlo hasta que estés satisfecho con el aspecto. Creo que este nudo de bufanda queda mejor cuando un extremo es ligeramente más largo que el otro.
The Over Hand scarf knot is very simple to tie, looks clean and functional, and provides good protection to the neck in cool weather.
Drape the scarf around your neck, making one end longer than the other. Take the long end of the scarf, cross it over the short end, then bring it under and through the opening near your neck to tie.
After you tie the knot, pull on both ends of the scarf to tighten it until you are satisfied with the look. I think this scarf knot looks best when one end is slightly longer than the other.

4. Drapeado reversible
Es una forma estupenda de llevar una bufanda cuando hace frío. Tampoco en este caso hay que hacer el típico nudo inverso, pero protege mucho el cuello.
Colócate la bufanda sobre el cuello, asegurándote de que ambos extremos tengan la misma longitud.
Coge un extremo del pañuelo y pásalo por el cuello y por encima del hombro opuesto, luego haz lo mismo con el otro lado. No hace falta anudarlo: ajusta el pañuelo alrededor del cuello si es necesario y ya está.
This is a great way to wear a scarf in colder weather. Again, you don't really tie the Reverse Drape scarf knot, but it provides a lot of protection to the neck.
Drape the scarf over your neck, making sure both ends are of equal length.
Take one end of the scarf and bring it across your neck and over the opposite shoulder, then do the same with the other side. No need to tie it – adjust the scarf around your neck if necessary and you’re done.


5. Nudo de bufanda parisino
El nudo parisino, una forma muy elegante de anudar una bufanda, proporciona calor al cuello y es una buena opción cuando hace frío.
Se dobla la bufanda por la mitad a lo ancho y, a continuación, se vuelve a doblar por la mitad a lo largo.
Pásate la bufanda por el cuello y, a continuación, pasa los extremos sueltos por el agujero formado por el extremo doblado para hacer el nudo. Ajústate la bufanda alrededor del cuello y ya está, ya sabes cómo hacer el nudo de la bufanda parisina.
A very classy-looking way to tie a scarf, the Parisian scarf knot provides good warmth to the neck and is a good choice in colder weather.
Fold your scarf in half widthwise, then fold in half again lengthwise.
Drape the scarf over your neck, and then bring the loose ends through the hole formed by the folded end to tie the knot. Tighten the scarf around your neck and there you have it, you know how to tie a Parisian scarf knot.


6. Falso nudo
Hacer un nudo falso en una bufanda es complicado, pero es una opción estupenda para los días más fríos que quedará bien tanto con una chaqueta informal como con un abrigo de vestir.
Colócate la bufanda alrededor del cuello, con un extremo más largo que el otro. Coge el extremo largo de la bufanda y llévalo hacia atrás y alrededor de sí mismo para formar un lazo, luego lleva el extremo hacia abajo y a través del lazo.
Coge el otro extremo de la bufanda y llévalo también hacia abajo y a través del lazo para hacer el nudo. Sube el nudo hasta el cuello tirando suavemente de cada extremo de la bufanda mientras deslizas el nudo hacia arriba.
Knowing how to tie a fake knot in a scarf is complicated but it’s a great colder weather option that will look sharp with either a casual jacket or a formal overcoat.
Drape the scarf around your neck, making one end longer than the other. Take the long end of the scarf and bring it behind and around itself to form a loop, then take the end down and through the loop.
Grab the other end of the scarf and bring it down and through the loop as well to tie the knot. Work the knot up to your neck by gently pulling on each end of the scarf while sliding the knot up.

7. El maniqueo
Este nudo, poco frecuente, funciona mejor si se anuda con una bufanda más larga. Colócatela alrededor del cuello con un extremo más largo que el otro.
Coge el extremo largo y haz una lazada alrededor del cuello. Ahora toma el mismo extremo y mételo por el lazo que acabas de formar. Coge el otro extremo del pañuelo y pásalo también por la lazada para hacer el nudo. Ajusta la bufanda si es necesario.
Not too commonly seen, the Reverse Drape Tuck scarf knot works best if you tie it with a longer scarf. Drape the scarf around your neck, making one end longer than the other.
Take the long end of the scarf and loop it once around your neck. Now take the same end and tuck it through the loop you just formed. Grab the other side of the scarf and tuck it through the loop as well to tie the knot. Adjust the scarf if necessary.

8. Cruz drapeada inversa
Muy similar al anterior, este nudo queda muy bien cuando se anuda con una bufanda más larga.
Colócate la bufanda alrededor del cuello y haz que un extremo sea más largo que el otro.
Coge el extremo largo del pañuelo y pásalo alrededor del cuello. Ahora cruza el extremo largo del pañuelo por encima del otro extremo y, a continuación, súbelo por la abertura que acabas de formar para hacer el nudo.
Tira de los extremos de la bufanda para tensarla si es necesario, y ya está.
Very similar to the Reverse Drape Tuck, the Reverse Drape Cross scarf knot works great when you tie it with a longer scarf. Click here to discover how long a scarf should be.
Drape the scarf around your neck and make one end longer than the other.
Take the long end of the scarf and bring it up and around your neck. Now cross the long end of the scarf over the other end, then bring it up and through the opening you just formed to tie the knot.
Pull on the ends of the scarf to tighten if needed, and you’re done.

9. Cuatro en mano
Aunque parezca complicado, es perfecto para mantenerse abrigado cuando hace un frío que pela. A fin de cuentas, ¿no es ése el propósito de llevar una bufanda?
Debido a sus muchos pliegues, este nudo de bufanda es también una de las formas más enrevesadas de anudar una bufanda. Como en el nudo parisino, dobla la bufanda por la mitad, a lo largo y a lo ancho, y póntela sobre el cuello.
Coge uno de los extremos sueltos del pañuelo y pásalo por el bucle formado por el extremo doblado. Retuerce el lazo y, a continuación, pasa el otro extremo de la bufanda por el lazo para hacer el nudo.
Continúa ajustando el nudo hasta que quede bien colocado alrededor del cuello.
Puedes llevar este nudo con orgullo sabiendo que ocupa un lugar interesante en la historia de las bufandas. Los cocheros y conductores de la época victoriana popularizaron este nudo cuando descubrieron que podía hacerse mientras se sujetaban las riendas de un caballo.
It might look advanced but is perfect for keeping warm when the weather is freezing cold. Ultimately, is that not the purpose of wearing a scarf?
Because of the many folds, this scarf knot is also one of the most intricate-looking ways to tie a scarf. Like the Parisian Knot, fold the scarf in half, length and width-wise, and then drape it over your neck.
Take one of the loose ends of the scarf and pull it through the loop formed by the folded end. Twist the loop, then pull the other end of the scarf through the loop to tie the knot.
Continue to adjust the Four In Hand scarf knot until it sits neatly around your neck.
You can use this knot with pride knowing it has an interesting place in the history of scarves. Victorian-era coachmen and drivers popularized this knot when it was discovered it could be tied while holding the reins of a horse.

10. Dos vueltas
Este nudo es la mejor opción para las heladas, junto con el anterior, pero es mucho más sencillo de hacer. De nuevo, funcionará mejor si utiliza una bufanda más larga.
Colócatela sobre el cuello dejando un extremo mucho más largo que el otro. Coge el extremo largo del pañuelo y envuélvelo alrededor del cuello y repite la operación una segunda vez. Se trata de otro nudo en el que realmente no anudas la bufanda.
Ajústala si es necesario para que te cubra el cuello por completo y ya estarás preparado para lo que te depare el invierno.
The Twice Around scarf knot is the best choice for freezing weather next to the Four in Hand, but it is much simpler to tie. Again, it will work best if you are using a longer scarf.
Drape the scarf over your neck, making one end much longer than the other. Take the long end of the scarf and wrap it around your neck, then repeat again, bringing it around your neck a second time. This is another knot where you don't really tie the scarf.
Adjust the scarf if needed to completely cover your neck, and you are all set for whatever the winter weather has in store for you.


